Creating Your First Widget
Assuming you have Fabric installed, it's time to write your first widget!
The Basics
Here's an example of using Fabric to define a simple widget - you don't have to understand every line yet, since this guide will walk you through it.
import fabric # importing the base pacakge
from fabric.widgets.window import Window # grabs the Window class from Fabric
from fabric.widgets.label import Label # gets the Label class

window = Window() # creates a new instance of the Window class and assign it to the `window` variable
label = Label("Hello, World") # creates a new Label instance with the content being "Hello, World" and assigns it to `label`
window.add(label) # adds the label to the window
window.show_all() # to make the window and all of its children appear

fabric.start() # to start fabric
Run the code using python path/to/your/file.py
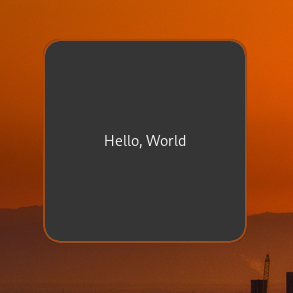
if everything goes fine, you should see a regular window that looks like this:

This code first imports Fabric and the widgets we need to use -- a Window and a Label. It creates a new instance of each widget, with the Label being initialized with the text "Hello, World". It then adds the label widget to the window, shows the window and all of its children, and starts fabric so the window is rendered.
"Now what?" Now, we do some real stuff!
Level 1: Boxes
Now let's demonstrate some boxes with some labels.
import fabric # importing the base pacakge
from fabric.widgets.window import Window # grabs the Window class from Fabric
from fabric.widgets.box import Box # gets the Box class
from fabric.widgets.label import Label # gets the Label class

box_1 = Box(
    orientation="v",
    children=Label("this is the first box")
)
box_2 = Box(
    orientation="h",
    spacing=28, # adds some spacing between the children
    children=[
        Label("this is the first element in the second box"),
        Label("btw, this box elements will get added horizontally")
    ]
)

box_1.add(box_2)

window = Window(
    children=box_1 # there's no need showing this window using `show_all()`; it'll show them itself because the children are already passed
)

fabric.start()
Result (notice the alignment of the labels):

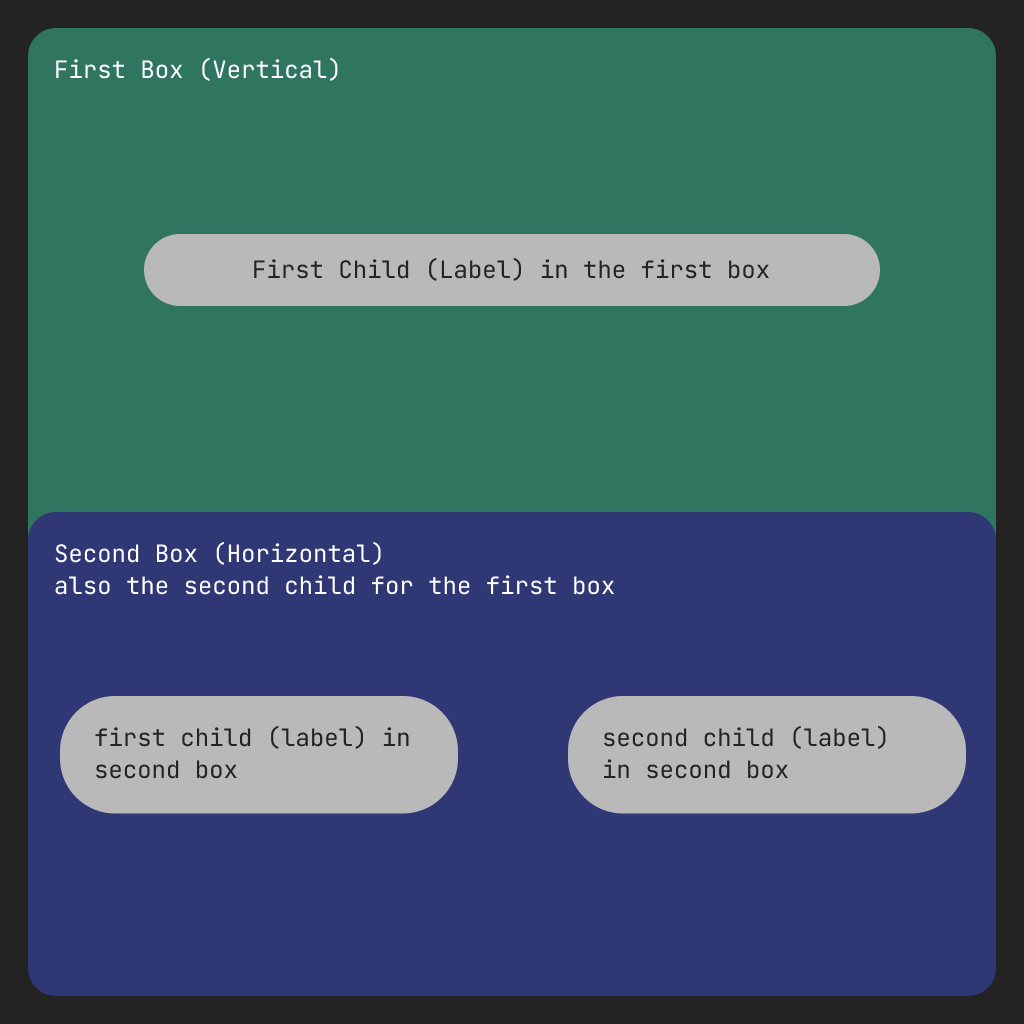
Here's a visual representation for more clarity:

You probably now have an understanding of how box containers can work with different orientations. Let's keep going.
Level 2: Buttons
First, here's the code:
import fabric
from fabric.widgets.box import Box
from fabric.widgets.label import Label
from fabric.widgets.button import Button
from fabric.widgets.window import Window

def create_button():
    button = Button(label="click me")
    button.connect("button-press-event", lambda *args: button.set_label("you clicked me"))
    return button

box = Box(
  orientation="v",
  children=[
    Label("fabric buttons demo"),
    Box(
      orientation="h",
      children=[
        create_button(),
        create_button(),
        create_button(),
        create_button(),
      ],
    ),
  ],
)

window = Window(
  children=box,
)

fabric.start()
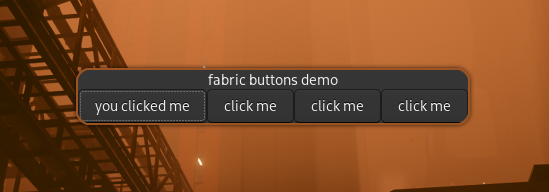
Result:

This demo creates a window with a box inside of it with the orientation set to vertical (for now, let's call it the first box). The first child inside that box is a label with the text "fabric buttons demo", and the second child inside the first box is another box. Let's call this the second box. This second box has 4 buttons, with each button created by a function that handles creating and connecting them. Since individual instances of widgets can't be children of other widgets twice, the create_button function creates completely new instances of Fabric buttons. These buttons' button-press-event signals are then connected to an anonymous function that changes the label to "you clicked me" when they are pressed by the user.
[!TIP] When you write a widget using Fabric, you're actually creating a genuine GTK widget under the hood! Fabric's purpose is to simplify and add an enjoyable touch to the widget-making process. As we delve into widget creation, we might, for instance, nest a button within a box or embed text inside a button. This approach to defining widgets will feel remarkably familiar to frontend developers and those who have experience writing HTML.